Achieving both quality and efficiency remains a constant challenge in sheet metal stamping, particularly for the automotive and aerospace industries. These sectors demand components with exceptional precision to ensure performance & safety.
At the same time, manufacturers must maintain high productivity to remain competitive. Consistency is crucial. Whether it’s the 100th part or the 10,000th part, every component rolling off the production line must meet the same exacting standards as the first. However, traditional QA methods can be slow and labor intensive, creating bottlenecks that hinder productivity.
Prioritizing either goal, quality or productivity, often risks undermining the other. To address this tension, manufacturers are turning to innovative solutions such as automation, smart factories, and analytics to meet rigorous quality standards while ensuring streamlined and efficient production workflows.
Innovations in QA
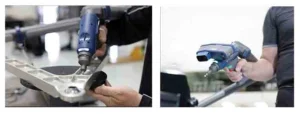
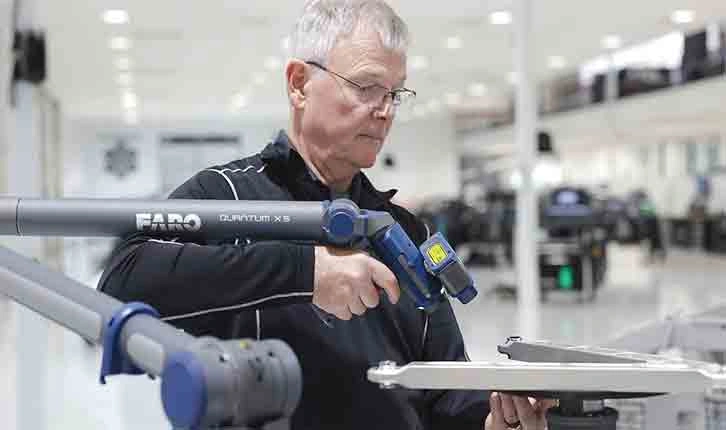
One key area of innovation is the quality control process itself. Cutting-edge tools, like advanced coordinate measuring machines (CMM) equipped with laser scanning technology on articulated arms, deliver both superior precision and accelerated productivity.
These highly sophisticated yet user-friendly portable metrology devices provide high accuracy, actionable real-time data, and eliminate the need for tedious manual QA processes. By streamlining quality control, they not only remove potential bottlenecks but also act as a driving force for greater process efficiency.
Unlike static manual check fixtures, portable metrology devices quickly adapt to a variety of tasks and part geometries without requiring extensive reconfiguration, reducing downtime and eliminating the need for multiple specialized fixtures. The adaptability and portability of these systems also reduce storage requirements, which is an important advantage in crowded manufacturing environments.
Strategic Preventive Maintenance
Portable metrology scanners also play a pivotal role in enabling digital ecosystems and fulfilling the vision of Industry 4.0. They deliver precise, real-time measurements while generating rich, detailed data clouds.
By seamlessly integrating with interconnected systems, they provide actionable insights that enhance decision-making, ensure traceability, and elevate product quality.
These scanners enable manufacturers to adopt data-driven preventative maintenance strategies with precision. Traditional scheduled maintenance often occurs too frequently, wasting resources and reducing productivity. On the other hand, when maintenance is too infrequent, it increases the risk of critical failures.
Portable metrology provides a solution by offering real-time insights into the actual condition of equipment. This allows maintenance to be conducted exactly when needed, reducing unnecessary downtime & preventing costly breakdowns.
• Early Detection of Tooling Degradation: Portable metrology systems detect wear and tear early, preventing defective parts, reducing waste, and ensuring traceability throughout the manufacturing process.
• Reduced Downtime: Accurate, detailed measurements provide valuable insights that accelerate troubleshooting and issue resolution. This ensures smooth operations while avoiding costly delays.
• Optimized Preventive Maintenance: Performing maintenance based upon accurate, real-time data on actual equipment condition allows manufacturers to strategically schedule maintenance, avoiding unnecessary disruptions and improving overall reliability.
By leveraging portable metrology and smart technologies, manufacturers can move beyond reactive approaches and embrace a proactive, precision-focused way of maintaining equipment and ensuring operational excellence.
Limitations of Check Fixtures
Check fixtures are valuable tools, but they do have notable limitations. Designed for specific parts or products, they lack flexibility and cannot easily adapt to design changes. While they effectively verify whether a part meets predetermined tolerances, they do not offer detailed insights into the root causes of defects. Furthermore, their dependence on manual handling introduces the risk of human error, which can compromise accuracy over time.
• High Time and Cost Requirements
Designing and building a traditional check fixture is a complex, time-intensive process. Engineers must carefully plan, construct, and validate each fixture to ensure accuracy. Errors during this process can lead to costly delays. The expense to create, certify, and maintain just one fixture can exceed $100,000, and costs climb even higher for larger or more intricate components
• Limited Data Output
Traditional check fixtures typically provide simple “go/no-go” feedback, offering little to no quantitative data. In modern manufacturing environments, where detailed insights, traceability, and process optimization are essential, this lack of detailed feedback diminishes their utility.
• Single-Purpose Design
Each check fixture is custom-built for one specific part, requiring a new fixture for every unique design. This inflexibility leads to ongoing expenses and inefficiencies, especially in industries with frequent design changes or short production cycles.
• Maintenance and Storage Burdens
After production ends, check fixtures often need to be stored for years, sometimes decades. Proper storage involves cataloging, protection, and maintenance, with companies spending approximately 4% of a fixture’s original cost annually to ensure long-term usability. This adds to the already significant lifetime cost of traditional fixtures.
While traditional check fixtures remain a cornerstone of manufacturing, their high costs, rigidity, and limited capabilities make them increasingly impractical for modern, agile production environments.

The Evolution of Check Fixtures: Modular Solutions
To address the inefficiencies of single-use fixtures, manufacturers have turned to modular fixtures. These systems feature interchangeable components that can be reconfigured to accommodate design changes, eliminating the need to build entirely new fixtures for updated parts.
By enabling quick adjustments, modular fixtures significantly reduce development time and lower costs, making them a practical choice for industries with frequent product updates or lower production volumes.
Modular fixtures also offer significant advantages in maintenance and storage. Unlike traditional fixtures, modular components can be disassembled and stored compactly, reducing the need for extensive storage space. Maintenance is simpler and less costly, further enhancing their long-term value.
However, modular fixtures are not without their limitations. While they provide flexibility and cost-saving benefits, they may not be suitable for highly complex geometries or extreme precision requirements. Reconfiguring modular components can also be time-consuming and may introduce slight variations that affect measurement accuracy.
Additionally, for industries requiring rapid, real-time data collection or on-site inspections, modular fixtures might not offer the same level of portability or advanced capabilities as more advanced technologies.
Portable CMMs: The Most Efficient Solution
To overcome these limitations, sheet metal manufacturers are increasingly turning to portable coordinate measuring machines equipped with articulated arms. Portable CMMs are highly mobile, versatile, and capable of delivering exceptional precision, rivaling that of traditional fixed CMMs typically confined to controlled environments like laboratories.
Portable CMMs offer unparalleled mobility, enabling inspections to take place directly on the production floor. This eliminates the need to transport parts to a lab, allowing for efficient in-process inspections that integrate seamlessly into manufacturing workflows.
Advanced Scanning Technologies
Modern portable CMMs leverage non-contact scanning techniques, such as laser scanning and structured light scanning, for fast and accurate data acquisition.
These systems generate dense point clouds, creating comprehensive 3D representations of complex geometries with ease.
Such scanning capabilities are especially valuable in industries like automotive and aerospace, where precision and complexity are critical. Non-contact measurement systems excel at inspecting delicate materials, such as ultra-lightweight sheet metal used in modern designs.
Unlike traditional probes, which risk deforming sensitive parts and compromising measurement accuracy, these advanced systems ensure reliable, repeatable results.
Adaptability: Switching Between Probing and Scanning
One of the standout features of advanced portable CMMs is their ability to switch seamlessly between probing & scanning modes. This adaptability is invaluable when dealing with varied inspection requirements. For instance, operators can quickly scan large areas for general measurements and then switch to tactile probing for certifying adherence to specifications in detailed areas, capturing all data in a single integrated file.
This dual functionality ensures both efficiency and accuracy, meeting the diverse needs of customers.
For manufacturers seeking all of these capabilities in a single solution, FARO Technologies, a global leader in 3D measurement, imaging and realization solutions, offers the Quantum X FaroArm® Series.
This series provides seamless integration of contact and non-contact measurement, modular design, and advanced scanning technologies, addressing the full range of quality control needs in modern sheet metal stamping.
Maneuverability: Reaching the Hard-to-Reach
The latest portable CMMs are equipped with an advanced eight-axis system, offering unmatched maneuverability. This innovative design allows users to inspect hard-to-reach areas without the need for disassembly or reassembly, simplifying the measurement process and saving valuable time.
Ideal for measuring complex geometries and large-scale objects, this system enhances ergonomics and reduces operator fatigue. The result is a more user-friendly and efficient user experience.
Configurability and Modularity
Modern portable CMMs are highly configurable, offering arms of different lengths to suit various applications. Interchangeable scanning modules, with varying focal lengths and resolutions, allow operators to switch between quickly scanning large areas & capturing detailed scans of specific features. Advanced systems also offer customizable operator handles, such as pistol-grip or two-button designs, ensuring maximum comfort and efficiency tailored to diverse operator needs and applications.
High Efficiency without Compromising Quality
Achieving both precision and efficiency is a critical challenge in sheet metal manufacturing for the automotive and aerospace industries. These sectors demand uncompromising quality to ensure performance and safety.
Portable metrology provides a transformative solution, streamlining inspection processes without compromising accuracy. By adopting these methods, manufacturers can enhance productivity while maintaining the highest standards of precision.


